Your Basement's First Line of Defense
When spring arrives in Michigan, your sump pump becomes the most important piece of equipment in your home. As snowmelt and spring rains saturate the soil around your foundation, your sump pump works overtime to keep water out of your basement. But here's the problem: most homeowners don't think about their sump pump until it fails - and by then, the damage is already done.
According to the Insurance Information Institute, water damage is one of the most common and costly homeowner insurance claims. In Southeast Michigan communities like Clinton Township, Sterling Heights, and Macomb Township, sump pump failures during spring thaw account for thousands of flooded basements each year.
The good news? A few minutes of testing and maintenance now can prevent a disaster later. Here's how to make sure your sump pump is ready for spring.
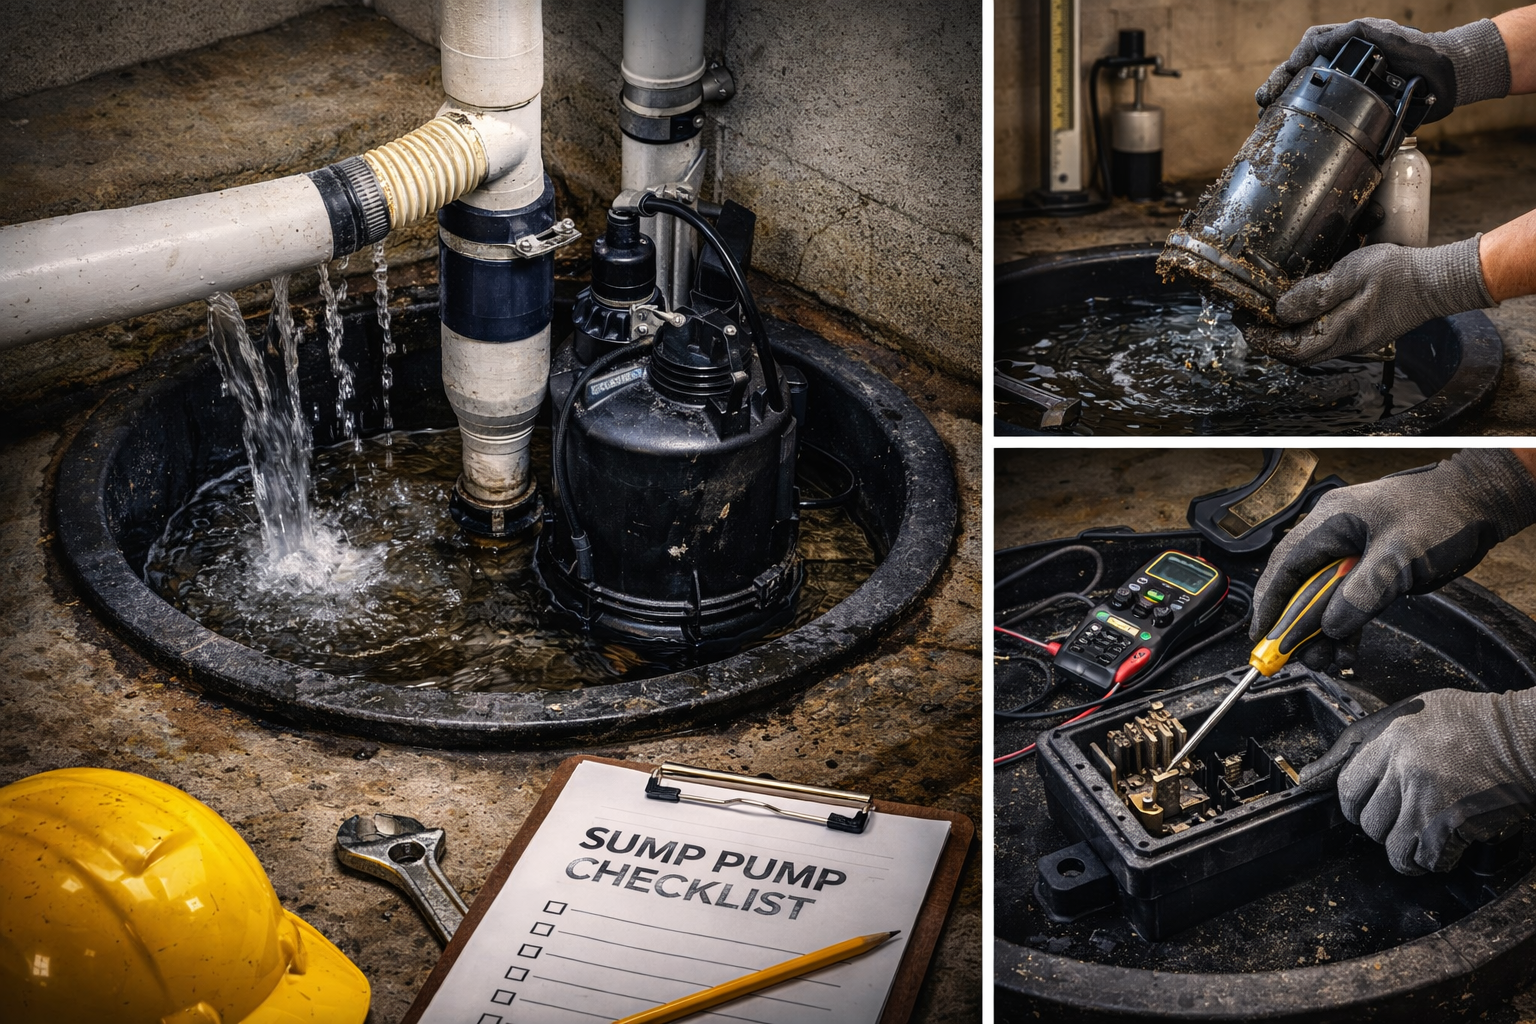
DIY Sump Pump Testing: 5 Essential Steps
Before the spring rains begin, test your sump pump system with this simple process:
Step 1: Visual Inspection of Pump and Pit
Start by examining your sump pit and pump:
- Remove the pit cover (if you have one) and look inside
- Check for debris: Remove any gravel, dirt, or objects that could clog the pump
- Inspect the pump itself: Look for visible rust, corrosion, or damage
- Check the float switch: Make sure it moves freely up and down
- Examine the power cord: Look for fraying, damage, or loose connections
If your pit has more than 2 inches of sediment at the bottom, it's time for a cleaning. Excess debris can clog the pump intake and cause premature failure.
Step 2: Power and Outlet Verification
Sump pumps should be plugged into a dedicated GFCI outlet:
- Verify the outlet is working: Test with a voltage tester or plug in another device
- Check the GFCI: Press the "Test" button, then "Reset" to ensure it trips properly
- Confirm proper grounding: The pump should be on a dedicated circuit
- Look for extension cords: Pumps should never be connected via extension cord
If your GFCI trips frequently, this may indicate a problem with the pump motor or wiring that needs professional attention.
Step 3: The Water Test (Float Switch Activation)
This is the most important test - it verifies your pump actually works:
- Fill a 5-gallon bucket with water
- Slowly pour water into the sump pit until the float rises
- The pump should activate when water reaches the trigger level (usually 8-12 inches)
- Listen to the pump: It should run smoothly without grinding or rattling
- Watch the water level drop as the pump evacuates the water
- The pump should shut off automatically when the water level drops
If the pump doesn't activate, check that the float switch isn't stuck or tangled. If the pump runs but doesn't move water, there may be a clog in the impeller or intake screen.
Step 4: Discharge Line Inspection
Water has to go somewhere - and if your discharge line is blocked, your pump is useless:
- Follow the discharge pipe from the pump to where it exits your home
- Check for ice blockages: In late winter, the line may be frozen at the exit point
- Inspect the check valve: This prevents water from flowing back into the pit (you should hear/feel it close after the pump shuts off)
- Verify the exit point: Water should discharge at least 10 feet from your foundation
- Look for disconnections: Ensure all pipe joints are tight and not leaking
If your discharge line freezes regularly, consider installing a freeze guard or an auxiliary discharge outlet.
Step 5: Battery Backup System Test
Power outages during storms are common - and that's exactly when you need your pump most:
- Check the battery age: Most batteries need replacement every 2-3 years
- Test the battery charge: Most backup systems have indicator lights showing charge level
- Simulate a power outage: Unplug the primary pump and run the water test - the backup should activate
- Check water level in battery: If you have a wet-cell battery, ensure water levels are adequate
- Verify the alarm: Most systems have an audible alarm when the backup activates
If you don't have a battery backup, spring is the time to add one. During heavy storms, power outages can last hours while water continues to pour into your pit.
5 Warning Signs of Sump Pump Failure
Watch for these red flags that indicate your pump needs attention or replacement:
1. Strange Noises
A healthy sump pump should run relatively quietly. If you hear:
- Grinding or rattling: May indicate a damaged impeller or loose components
- Humming without pumping: The motor runs but the pump is stuck or clogged
- Loud vibrations: Could mean the pump isn't properly seated in the pit
2. Continuous Running
If your pump runs non-stop, possible causes include:
- Float switch stuck in the "on" position
- Pump undersized for water volume
- Check valve failure (water flowing back into pit)
- Discharge line clog or freeze
Continuous running causes premature motor burnout - this needs immediate attention.
3. Irregular Cycling
Pumps that turn on and off frequently may have:
- Float switch set at the wrong level
- A check valve that's not sealing properly
- Electrical issues with the float switch
4. Visible Rust or Corrosion
Rust on the pump housing, discharge pipe, or connections indicates:
- Age-related deterioration
- Battery corrosion (for backup systems)
- Potential structural weakness that could lead to failure
5. Age Over 7 Years
Most sump pumps have a lifespan of 7-10 years. If your pump is approaching or past this age, even if it's working now, replacement should be on your radar. It's far better to replace proactively than to discover failure during a spring storm.
Seasonal Maintenance Schedule
Keep your sump pump reliable year-round with this maintenance calendar:
Monthly
- Check that the pump is plugged in and the GFCI outlet works
- Verify the battery backup indicator shows a full charge
Quarterly (Every 3 Months)
- Perform the water test (pour 5 gallons into the pit)
- Clean debris from the pit
- Check the discharge line exit point for obstructions
Annually (Before Spring)
- Complete full inspection (all 5 steps above)
- Clean the pump intake screen
- Test the check valve
- Test the battery backup under load
- Consider professional inspection for older systems
When to Upgrade Your Sump Pump System
Consider upgrading your system if:
- Your pump is over 7 years old: Even if working, efficiency decreases with age
- You don't have a battery backup: Essential protection during power outages
- Your pump struggles during heavy rain: You may need higher capacity (measured in GPH - gallons per hour)
- You've had flooding despite a working pump: Multiple pumps or higher capacity may be needed
- Your home is in a high water table area: Consider a water-powered backup for unlimited runtime
At Mansour's Innovations, we install complete sump pump systems with battery backup throughout Southeast Michigan. We'll assess your home's specific needs and recommend the right capacity and features for reliable protection.
Free Sump Pump Inspection
Not sure if your sump pump is ready for spring? We offer free inspections to assess your system and recommend any needed repairs or upgrades. Don't wait until the spring rains reveal a problem.